A more in-depth look and video to come! I may even be able to save this keyboard from the landfill once again. Maybe.
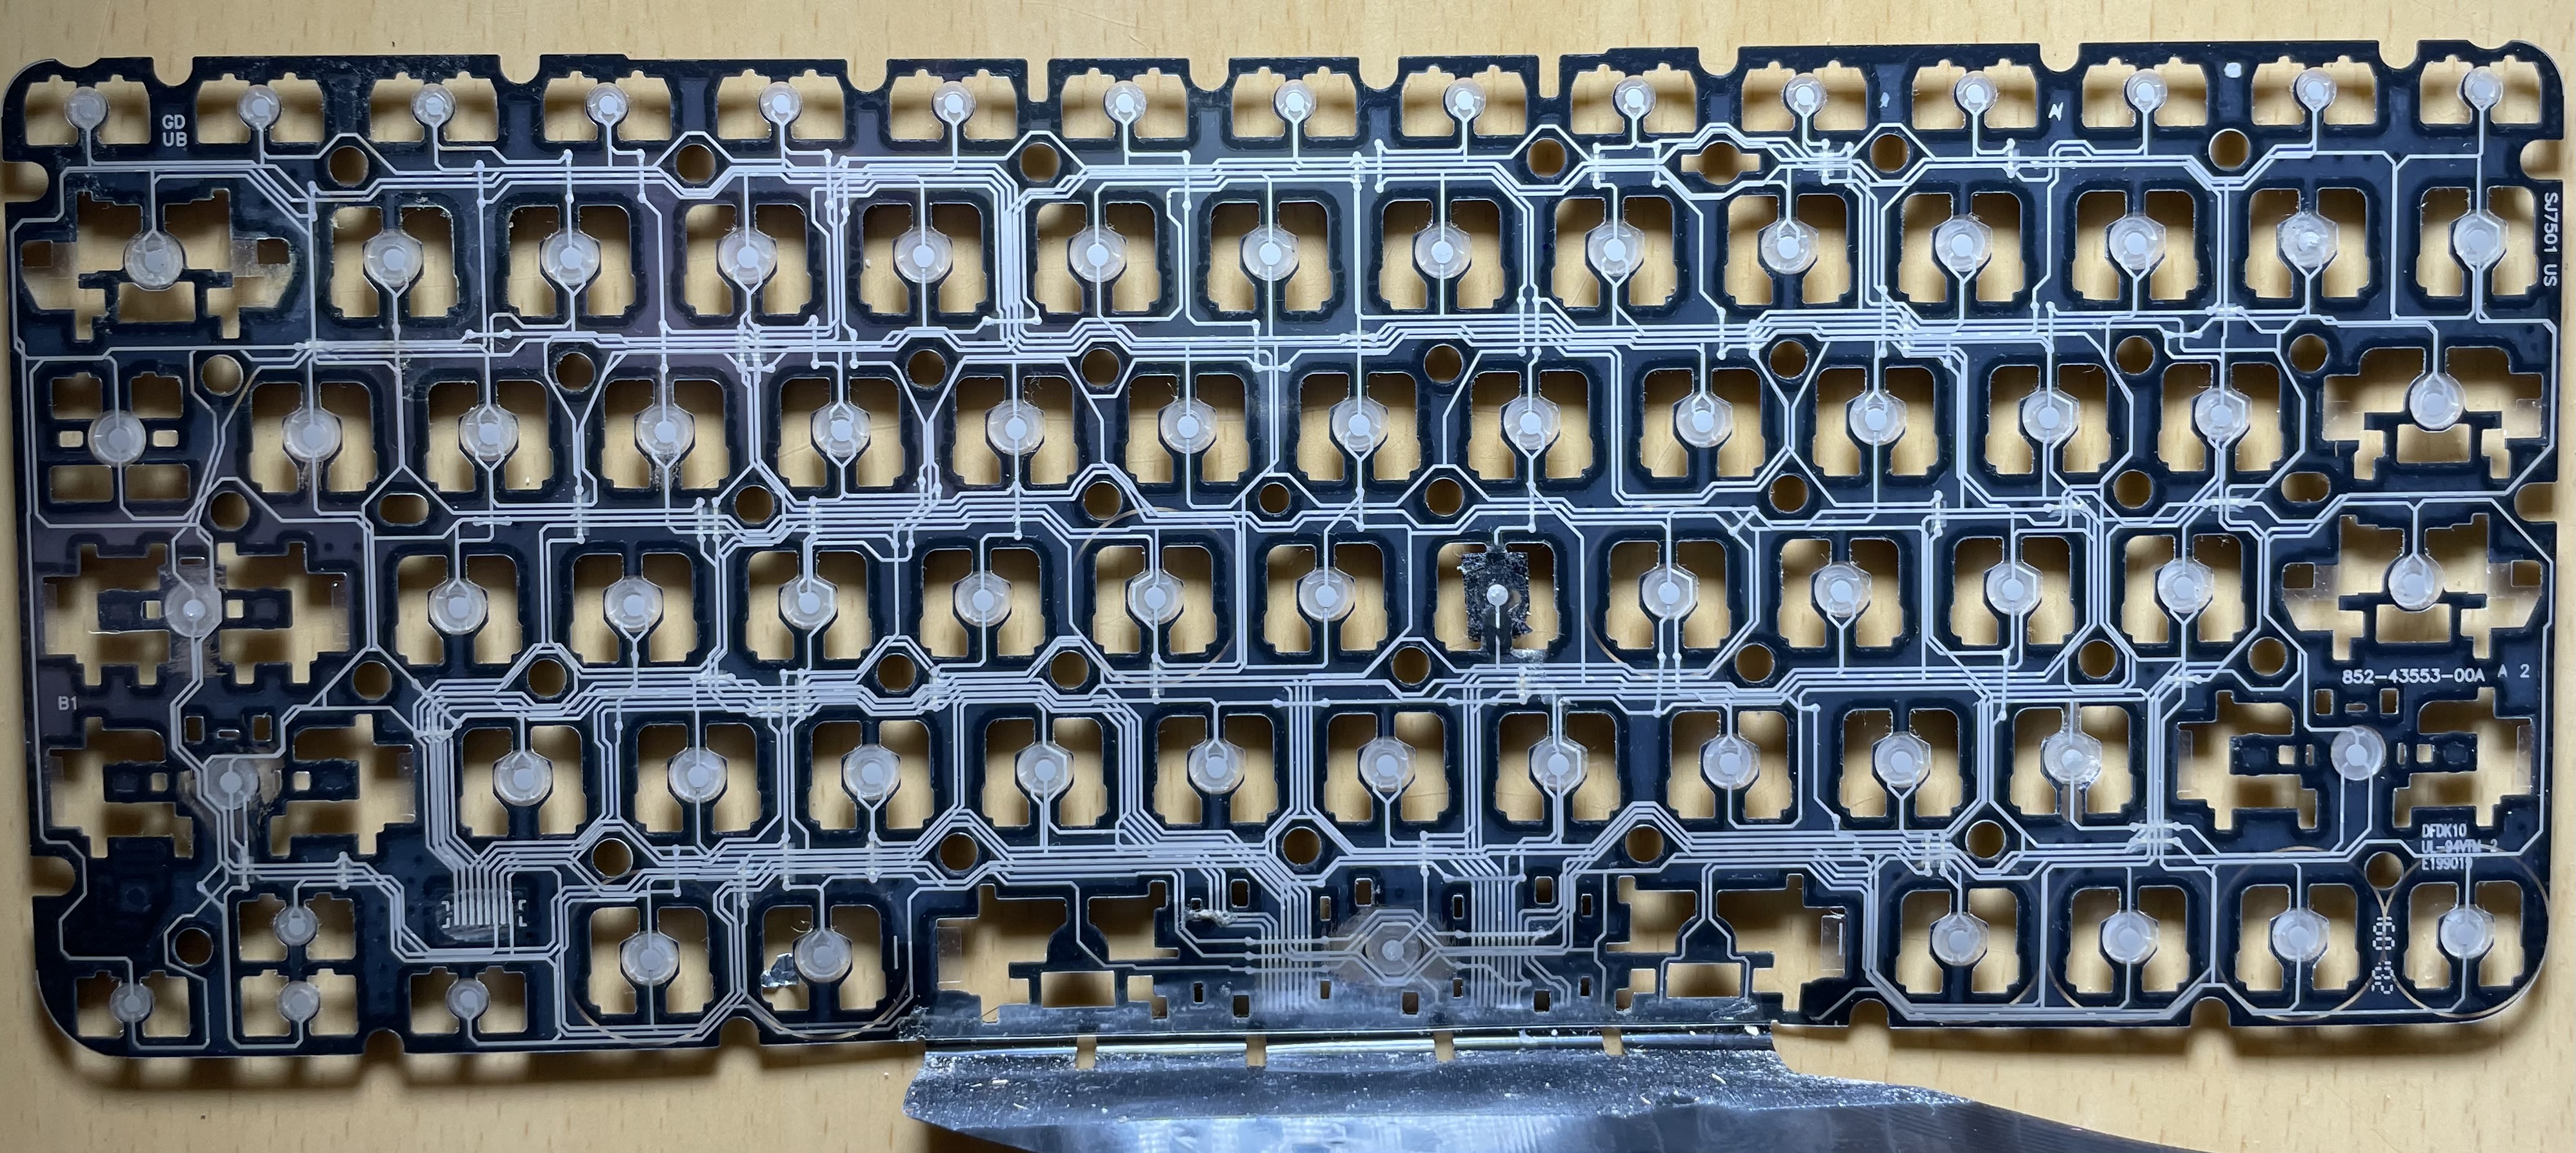
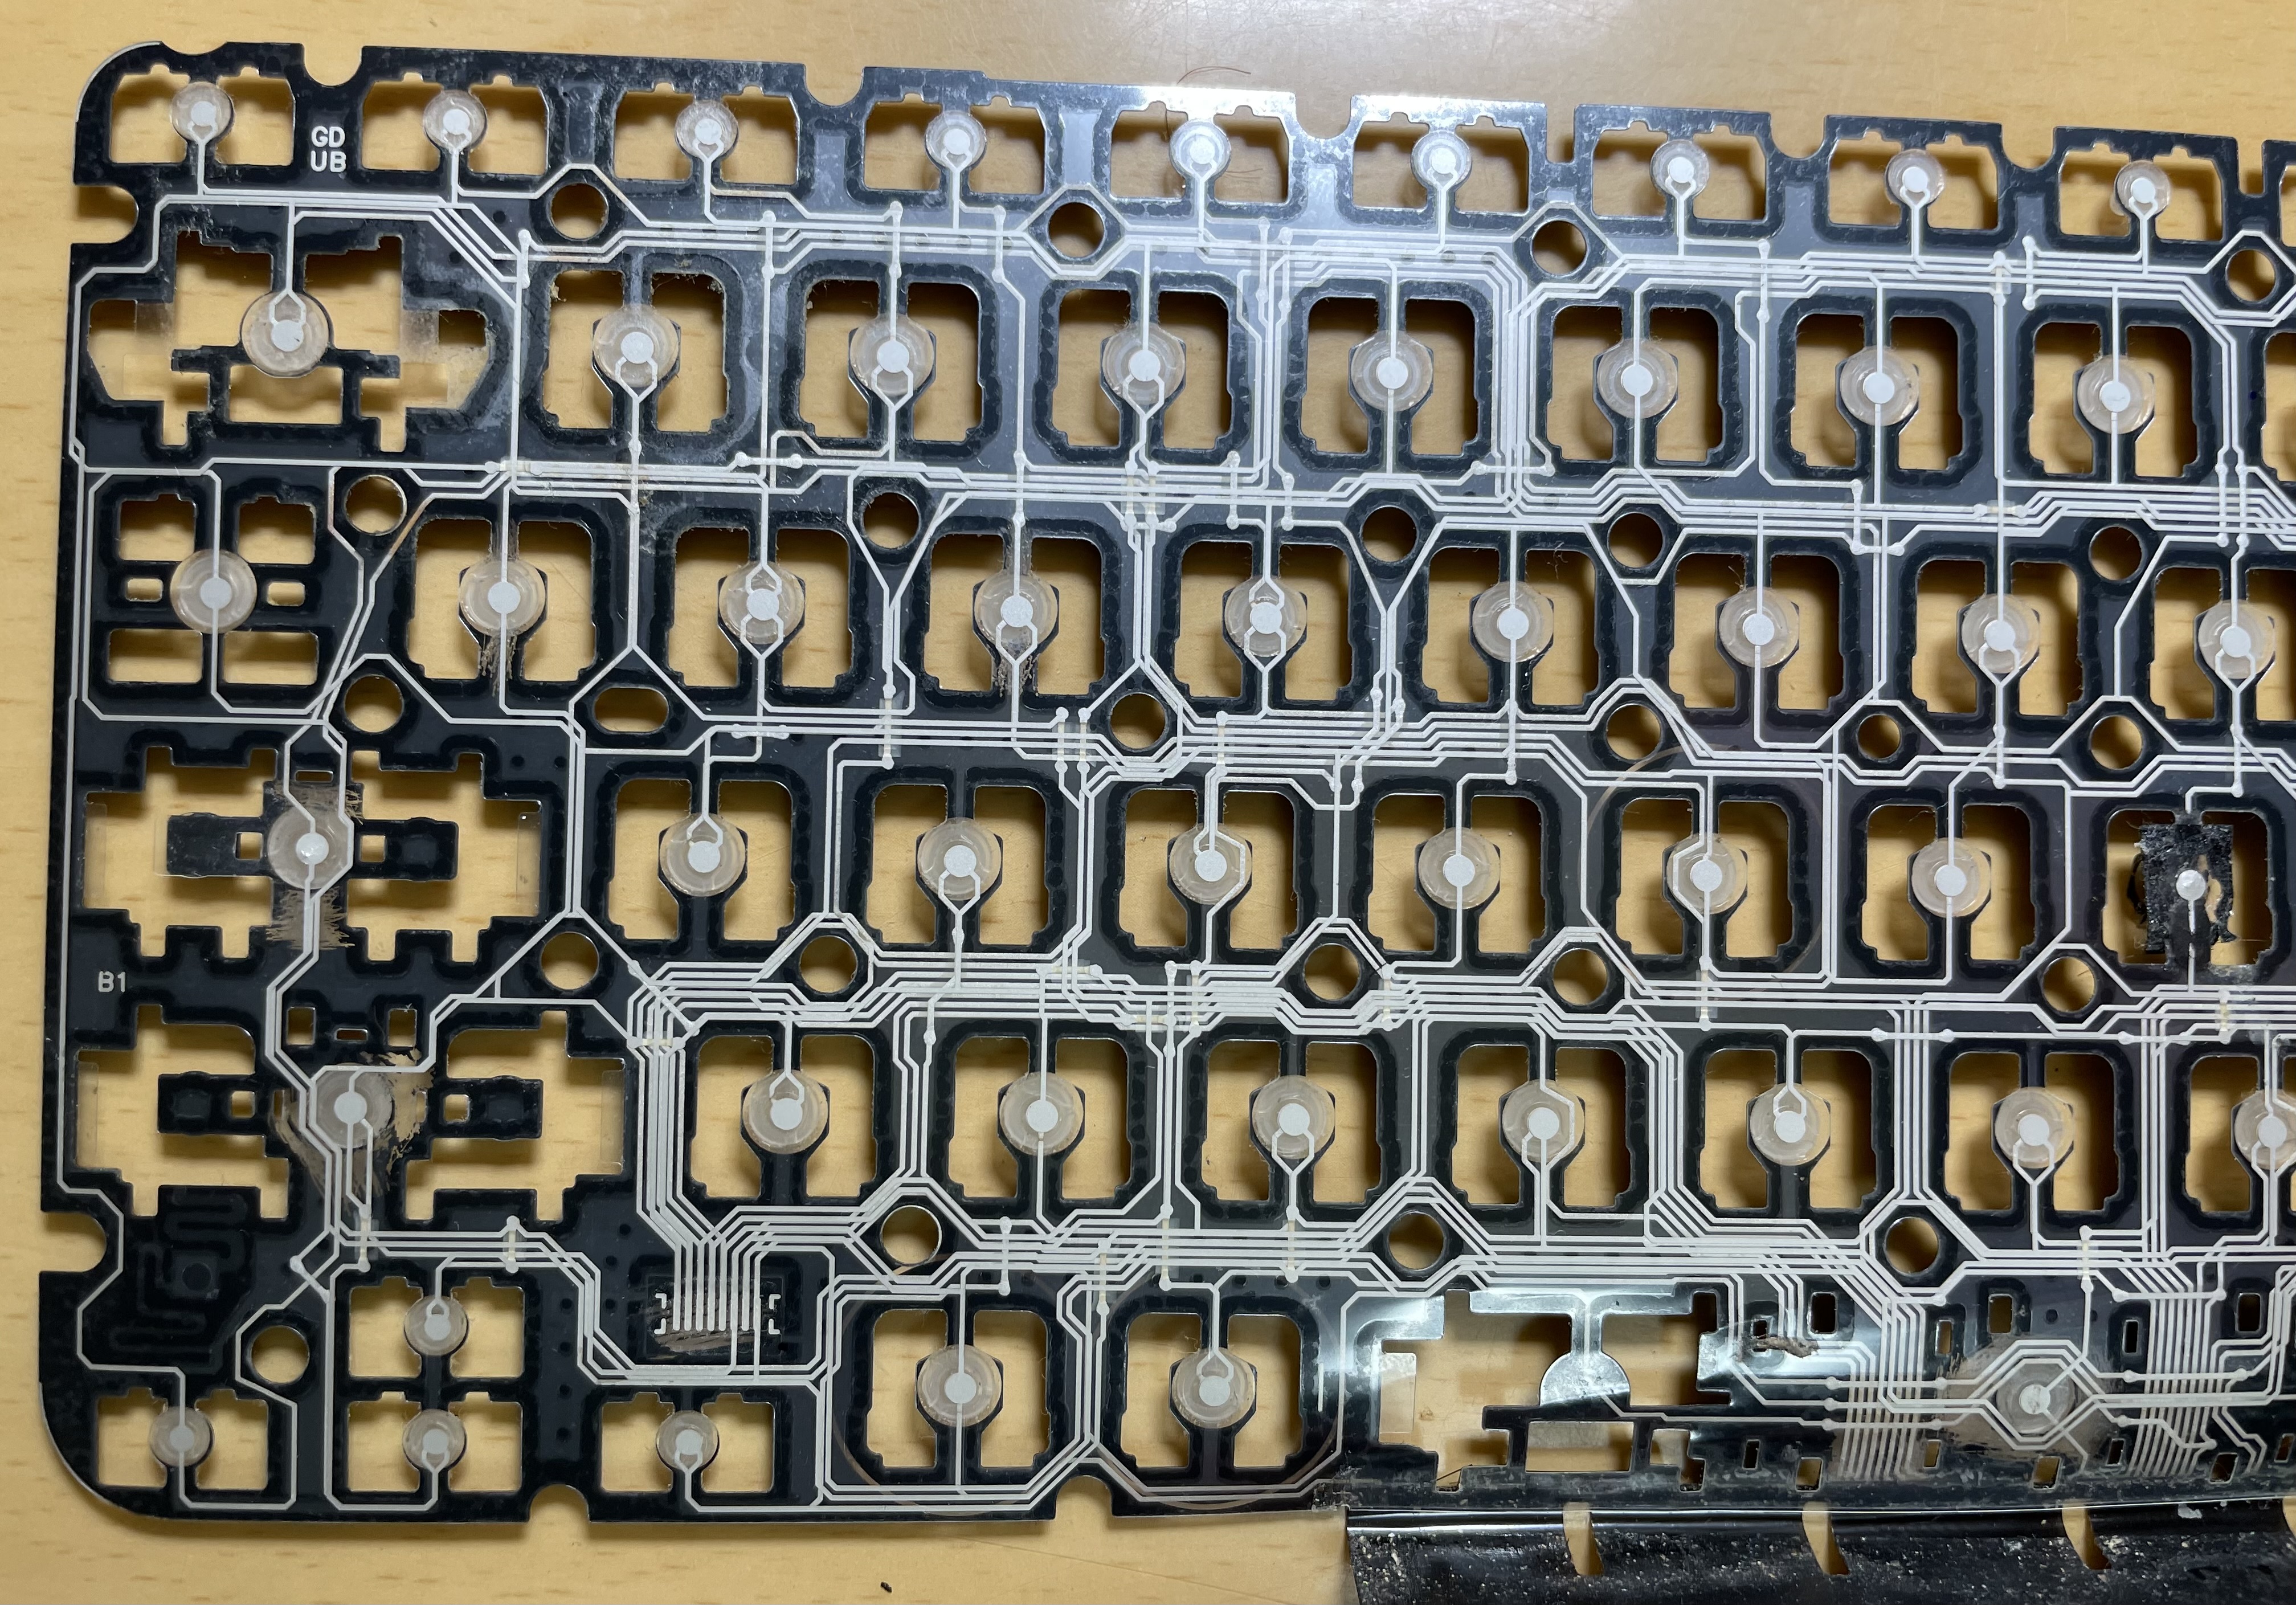
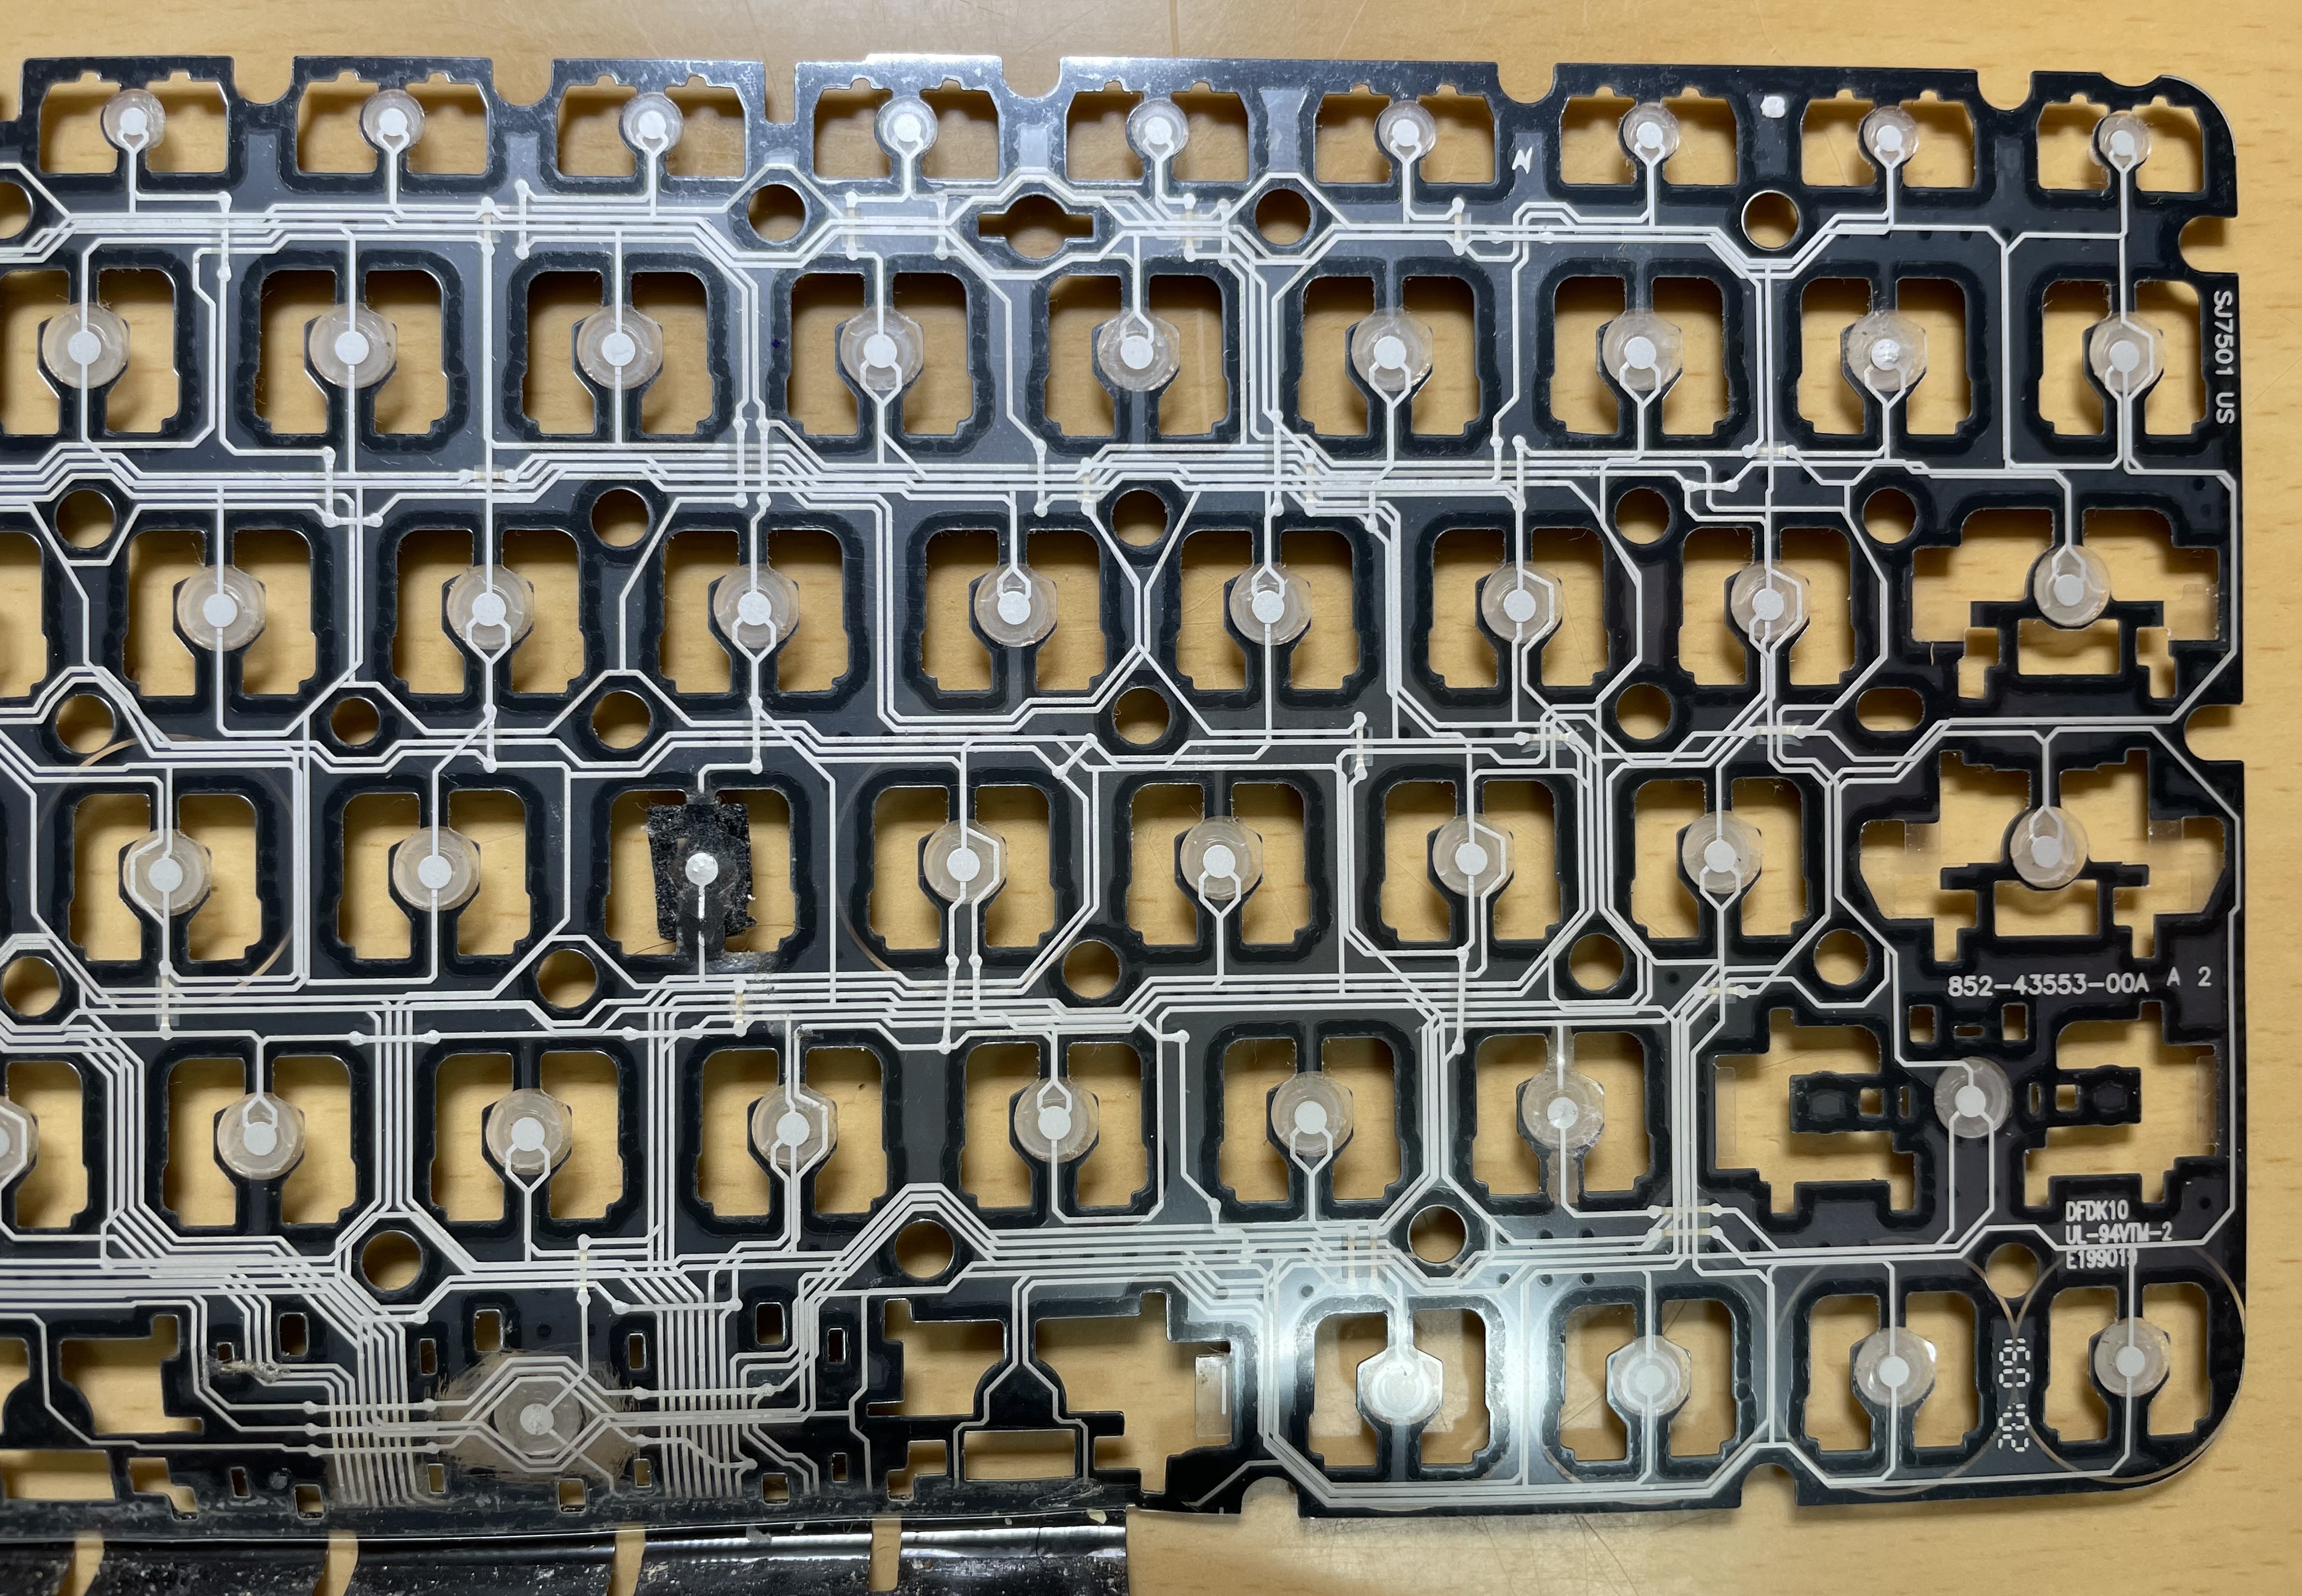
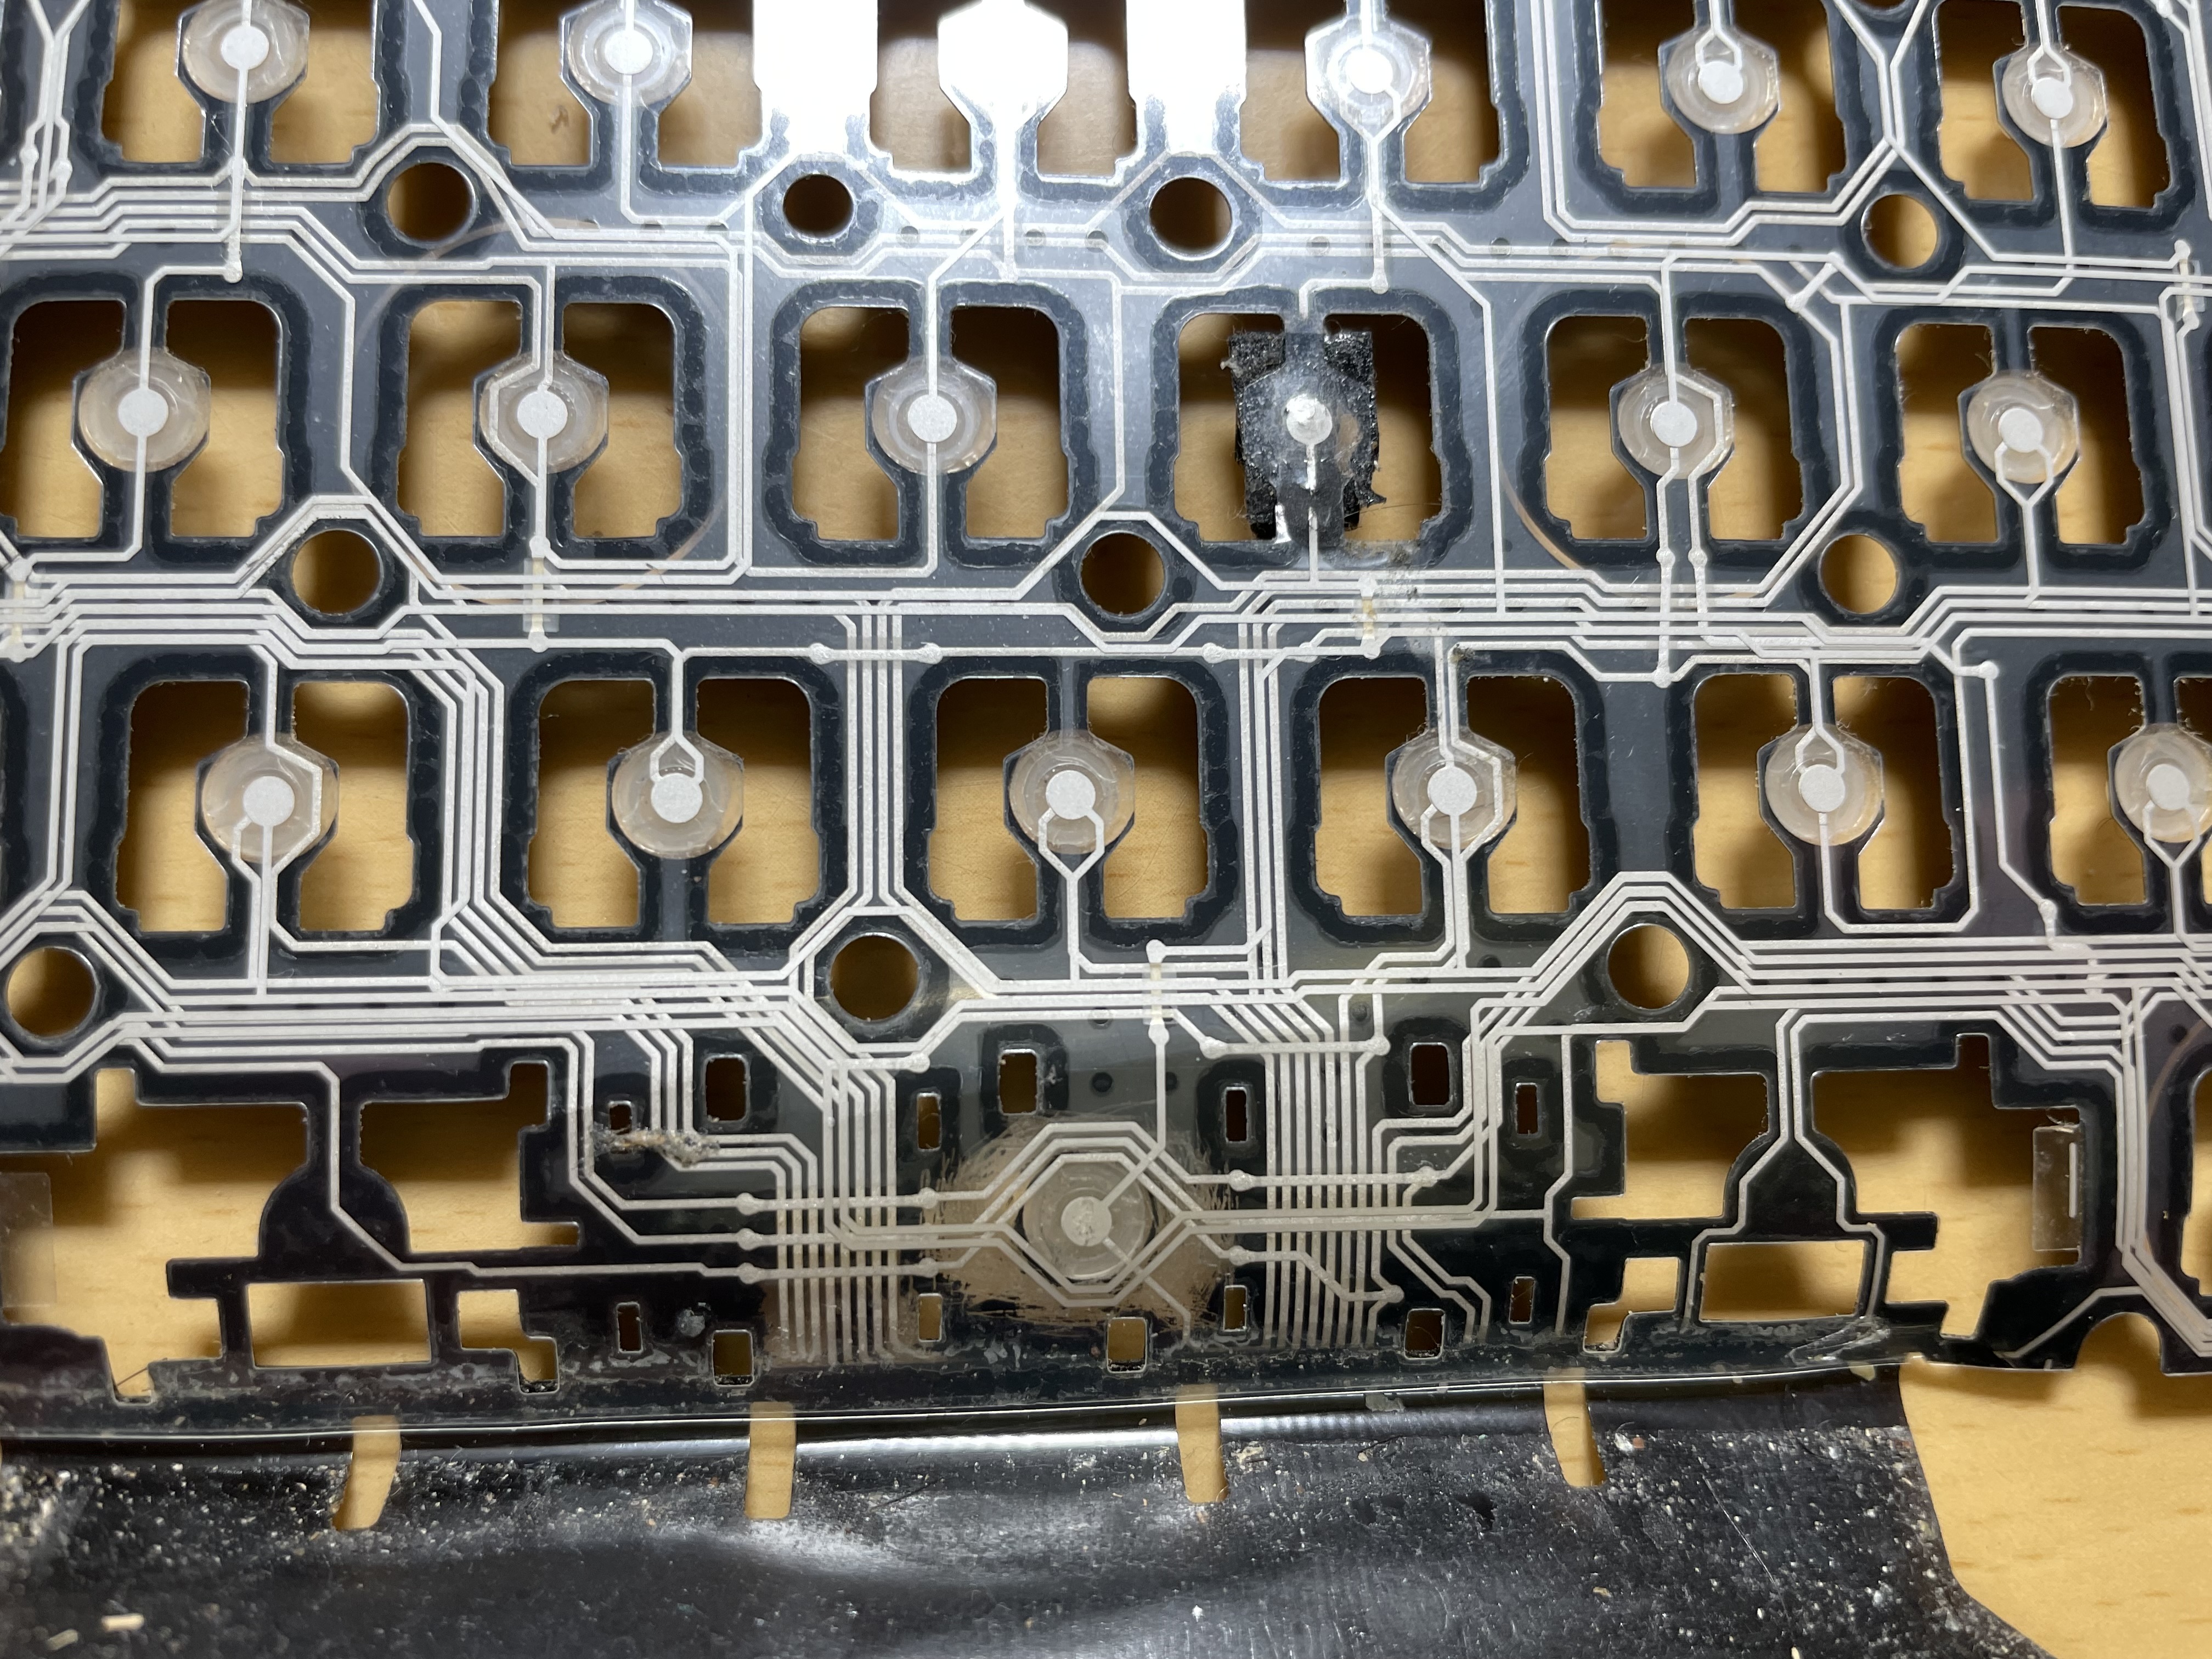
But in the meantime (while you wait for me to get up off my lazy ass), here are some high-res pictures of the traces to help you with your own repairs. At least it will let you know what you’re working with. I didn’t want to split the two layers of plastic because the traces from one side link to the other through a main connection point and getting it back together would be a big headache. But if you look close, you’ll be able to see the traces going under and over each other and will be able to follow where they go.
(Pics are from the rear of the membrane. The ribbon cable is the bottom of the keyboard. Look for the arrow keys to orient yourself. Since this is the rear, the left side of the membrane is the right side of the keyboard as your are facing it.)
Click on each pic to see the high-resolution version. And if you need even more pics, you can find them here. (I’m releasing all the pics to help you guys because I wish I had these pics myself when I was working on this thing. If you want to use the pics for any purpose, I’m putting them under Creative Commons—just link and attribute to this site.)